BOTTLING DAY
Wine is ready! Bottling day is exciting, simple and straightforward.
First, you will need to select the right wine bottle supplies such as bottles, corks, capsules and corker.
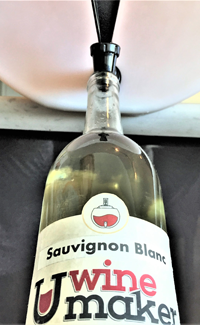
BOTTLES
The most common and best bottle for our application is a glass, cork finish, Bordeaux style bottle. These bottles have a straight body and straight neck. They are easily filled to a proper level for corks, which is at the base of the neck. The straight body makes them stackable. Typically, they are clear or green. Traditionally, clear is for whites and rose’, green is for red. You will need 30 clean and sanitized bottles. Soak the bottles in a cleaning sanitizing solution of pink powder or similar and rinse. If bottles are clean, use a couple of sprays of sulphite and rinse.
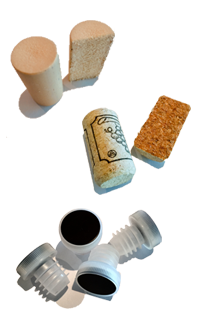
CORKS
The standard cork for a 25 oz/750 ml bottle is a #9 cork. We suggest synthetic or Agglomerated (agglo) corks.
- Synthetic corks cost a little more, however, bottles with synthetic corks can be stored upright or on their side. Depending on how you plan to store your wine, this may be important. They have a long storage life and are considered the best cork.
- Agglo corks are made of compressed pieces of cork. Bottles with agglo corks need to be stored on their side to keep the cork moist. They are designed for a 1-2 year storing.
- Push in plastic ringed tee stoppers can be used for short term 6 month storing and do not require a corker.
- Corks and tee stoppers should be placed in a bowl of warm water with a ¼ teaspoon of sulphite prior to corking. There is no need to soak or boil them.
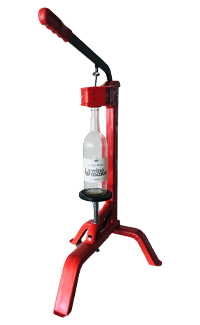
CORKER
There are two common types of corkers, floor corkers and double lever hand corkers. Floor corkers work the best and are the most popular. If storage space is a concern then the double lever hand corker will do the job using the softer synthetic corks.
PROCESS
- Hold the bottle slightly tilted onto the UWinemaker’s single stage fermenter built in tap, open the tap and the wine will flow down the inside face of the bottle without splashing. Fill the bottle to the base of the neck. This will give you the proper air space (ullage), approximately ¾ inch/18mm, between the wine and the cork. Too much air space will result in oxidation and too little air space will result in extremely compressed air, which may result in wine leakage or pushing the cork up or even out. Leaving bottles standing upright after corking 2 -3 days will release the compressed corked air pressure out of the bottle.
- There is a platform on the floor corker to place the bottle on. The platform slides up and down when the handle is in the upright position and it locks tight when the handle is drawn down to compress and insert the cork. The cork insertion depth can be adjusted with the keeper nut located on the driver plunger. Corks should be inserted flush or slightly lower with the top of the bottle.
- With the bottle filled to the base of the neck and the handle in the upright position, place your cork into the jaws, push the bottle down onto the platform, then using your bodyweight draw the handle downwards to insert the cork.
- Next, capsules can be applied to the top of the bottle. You can heat shrink the capsules onto the bottle by using a spoon to hold it in place while inserting the neck of the bottle into a pot of boiling water.
Leave the bottles standing upright for 2-3 days to neutralize the internal pressure. - Presentation and aesthetics are very important in every aspects of life and it’s the same with wine! Show off your beautiful bottles of wine with creative labels and capsules.
- Finally, wines will improve with time. Whites 1-2 months and reds 6 months or longer. Bigger reds take longer. Store bottles in a dark and preferably cool closet or cellar.